Every Halloween Party Needs a Pinata!
When you think of Halloween parties, you think of pumpkins, skeletons, corn, and costumes. But… do you think of pinatas?
You should!
The Halloween pinata is often overlooked at a great addition to every Halloween party. After all – isn’t a pinata the absolute best place to hide the candy?
Here are some ideas to help you get your Halloween Pinata Party on!
(Photo Credit: Halloweenerrific.com)
Every Halloween Party Needs A Pinata!
Check Out This Great Selection Of Halloween Party Pinatas – They’ll Add That Finishing Touch To Your Halloween Party Decor!


Homemade Halloween Pinatas
Materials Needed– For the Pinata “Frame” or Shape: Balloons of all shapes and sizes, old newspapers, tape, scissors, construction paper, and string. For the “Paste” Mixture – flour or starch, water, and glue (I use Elmer’s white glue), and a large pot to cook the paste in.
Form The Body Of The Pinata – Inflate one or more balloons, depending on the size you want your pinata to be. I generally start with round balloons and than add additional “shapes” for legs, tails, hats, brooms, etc. with thin cardboard, rolled newspapers or even construction paper. Tape your pinata shapes together securely with a tape of your choice.
Cook Up Some Paste – In your large cooking pot mix 1 part flour or starch to 2 parts water. Mix the ingredients well, and then simmer on the stove for about 5 minutes, or until the paste just begins to thicken. (NOTE: If you cook your paste too long, it will become too thick and more difficult for you to use.) Pour the warm paste into a tightly closed container and set it aside.
Prepare Your Papier-Mache Strips – Tear newspaper pages into strips that are 1 inch – 1-1/2 inches wide. Dip these strips into your paste mixture and place them onto your pinata shape until it is covered entirely.Let the form dry for 10-15 mintues, and then apply a second layer of strips.
Apply The String – Before applying your third layer of paper strips, wrap a string around the pinata form, leaving a long string “tail” at the top of the pinata. This string is what you’ll use to tie your pinata to a pole or tree!
Paper Strip Layer Three – At this point, you can apply the third and last layer of paper strips to your pinata. Afterwards, set the pinata aside until it is completely dry. It should be hard to the touch.
It’s Time To Paint! – Once the pinata is completely dry, it’s time to paint! Choose a base color for your pinata – like orange for a pumpkin – and then make sure that you cover the paper strips completely and that the surface of the pinata is nice and relatively “smooth.”
Add Decorations To Your Pinata – After your paint has dried completely, it’s time to decorate your pinata by gluing on the crepe paper! Traditional pinatas are made by cutting wide strips of crepe paper and cutting one long side into a fringe. The strip of crepe paper should look kind of like a comb. Glue the non-fringed side of the paper to the pinata form. Don’t forget to add other features – like ears, noses, eyes, etc…
Cut Out The Flap – Carefully cut a small rectangular “flap” onto one side of the pinata using a serrated knife. This is where you will add the pinata goodies!
Feed The Pinata! – Now you’re ready to fill your new piñata with goodies like small toys, candy, or other party favors. Carefully tape the flap shut. Now your pinata is ready to party!
Halloween Pinata Fillers – Toys
Check Out These Great Selections Of Halloween Pinata Filler Toys!

Medium Assorted Pinata Filler Toys (100 pc)

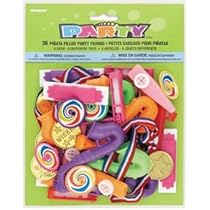
Large/Medium Pinata Filler Toys (36/pkg)

12 Silver Bead Necklaces- Pinata Filler

Festive Pinata Filler (36/pkg)

AMSCAN Assorted Pinata Party Favor Pack

Halloween Pinata Fillers – Candy
You Can Never Have Too Much Candy For Your Pinata – Check Out These Great Selections!
Mexican Candy Pinata Filler – 4 lb

Rhode Island Novelty Gold Coins, 144-Piece

Smarties Bulk ( 1lb Bag of Wrapped Smarties )


Airheads- Assorted Flavors, 90ct (Variety Pack)

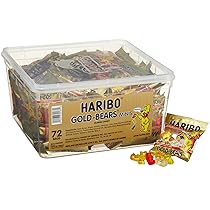
Haribo Gold-Bears Minis, 72-Count


